
Previous article in the series:
Welcome to Gunfighter School
The Mission of Gunsite Academy is to provide good people with the skills by which they my conduct themselves as responsible citizens of a free Republic.–Jeff Cooper, October, 1999
South Range at Gunsite Academy could be just about anywhere. The range is devoid of vegetation except for a few stubborn stunted weeds growing against the block walls that mark the left and right sides the outside edges of the range. Fluorescent green “bushes” mark each firing lane roughly two yards apart. Each lane has a bush marking the correct position to be in at 3, 5, 7, 10, 15, 25, and 35 yards, forming a large grid.

A large sand and gravel berm is the backstop behind the row of targets that will be the center of our attention for the majority of the next five days. Rangemaster John Hall, a SWAT officer in California and a rangemaster for his police force, had already gone over the safety rules during classroom session early Monday morning, along with the philosophies that form the underpinning of the Modern Technique of the Pistol. It was time to hit the range.
The range itself, while well laid-out, wasn’t all that important. It was the instruction that mattered.
Gear Check
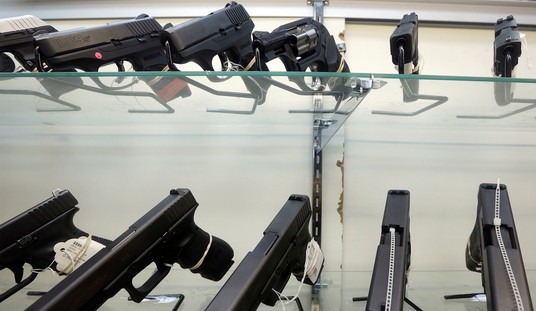
The 19 students had an interesting collection of guns and gear.
The 1911 in .45 ACP that Col. Cooper favored was well represented, along with at least one 1911 in 9mm. Two shooters carried Springfield Armory XDs in .45ACP. One carried a Taurus (809?). Another shooter carried an HK P2000. Everyone else seemed to carry some flavor of Glock.
I came with a Walther PPQ with a 5″ barrel, chambered in 9mm.

I’d run about 400 rounds through the pistol before the class and hadn’t cleaned it before coming to Gunsite. I thought that we’d find out how it fared when it was run hard and dirty.
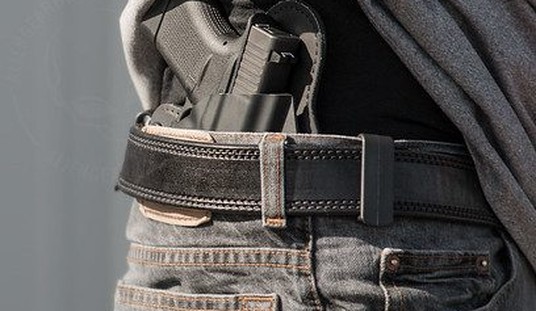
For holsters and a pair of mag pouches I went to Caleb Dahl, owner of Statureman Custom Holsters, who provided me with a great Kydex holster for the 5″ PPQ when most other manufacturers simply weren’t making models for the stretched PPQ yet. He also sent along a beautiful pair of single mag pouches.
The rest of the class seemed to have a roughly even mix of leather, kydex, and “other polymer” holsters. Three of the shooters had Serpa holsters that had to be disabled before being used. Gunsite doesn’t allow the use of Serpas, which isn’t that uncommon. Many ranges disallow the use of Serpas, in what may as well be called the ” Tex Grebner rule.” One guy brought a nylon “Uncle Mike’s” type holster, and it somehow made it through the whole week.
Some students brought their own ammunition, and others purchased their ammo packages from the Gunsite Pro Shop, where Remington reigns supreme.

Each student was required to have 50 rounds of frangible ammunition for the simulator runs, and 1,000 rounds of ammo for the square ranges. Remington provided my ammunition to run through the Walther I was using, and provided me with their top of the line Ultimate Defense Compact jacketed hollowpoints. I would find out over the course of the next five days whether or not the PPQ would handle a steady diet of JHPs after it started getting dirty.
About 3/4 of the class took Gunsite’s advice and brought knee pads for kneeling and prone positions, and everyone remembered (or purchased at the pro shop) a tactical light for Thursday night’s low light shooting.
Electronic hearing protection rules the day; foam plugs simply don’t cut it for 40+ hours of shooting in a five days.
[article continues on next page]
“On the Three!”
After the morning session in the classroom it was time for the range. We prepared magazines and dropped our gear off inside the cover shelter at the range and hydrated (we needed to drink every time we loaded ammo, due to the warm dry air). The instructor cadre went over the safety rules and range commands, and then had us “load and make ready” on the 3 yard line.
The Monday range session was dedicated to working on the critical mechanics of the Modern Technique, starting with getting the fundamentals of the presentation down.
Presentation
The first thing we needed to master was the 5-step presentation of the pistol from the holster to the target. Getting it right is the difference between setting yourself up for a shot properly, and missing.
- Grip
- Clear
- Click
- Smack
- Look
Grip
While I don’t pretend to know the background of the other attendees, the 250 Pistol course was my first “real” pistol training class, so everything was rather new to me. Prior to 250, I’d taken the NRA Personal Protection in the Home and Personal Protection Outside the Home classes, and I was present at Trace Armory Group’s NRA Defensive Pistol course ( the first of its kind on this side of the Mississippi, and the subject of a future article). I’d taken my concealed carry permit class, and did the sort of basic self-guided range shooting most everyone did.
Other than the singular exception of Trace Armory’s Defensive Pistol class, everything I knew about shooting a handgun up until 250 Pistol was designed to keep me from hurting myself or others with handgun. Nothing I’d taken really worked on fighting fundamentals. Even learning to grip the handgun properly and consistently every time in the holster was a new experience, considering most ranges won’t let shooters practice drawing from the holster.
All steps that instructors showed us were presented in a manner that would reach most students. Steps were describe verbally, while being shown in use. We then attempted to replicate what we saw and heard under the watchful eyes of our four instructors, who always seemed to be right there with a gentle correction… for some of us, that was more often than others.

Fortunately, the grip was something I seemed to develop muscle memory for rather quickly, and after a few false starts, I got it down fairly consistently. My hurdle was overcoming the tendency to “chicken wing” and have my elbow poking out, instead of having it directly behind the gun.
As your gun-side hand is finding the grip, your support side hand is coming across your chest at the exact same time. I’ll be the first to admit that I ended up refining my support hand placement as the days wore on, finding it a bit faster to move my hand a little higher and more to the shooting side as the presentation progressed.
Clear
Step two of the presentation was my first real hurdle, as I had a tendency to want to bring the pistol up higher when I drew it than was absolutely necessary. Learning just how far that I needed to draw the pistol—and no further—required some practice.
I had to get this down to progress to the next step of the process as efficiently as possible, because if I ever wanted to be fast, I needed to be efficient first.
Click (Rotate)
“Click” was created when the dominant guns at Gunsite were single-action pistols like the 1911. Now that so many shooters are using pistols without external safeties, the same step is also called rotate. After the pistol clears the holster, the next step is to rotate the gun barrel from vertical to horizontal while keeping the elbow tucked in to avoid wasted motion and the tendency of some to loop the gun barrel forward. While I wasn’t looping, my tendency to have my elbow out during the Grip stage really manifested itself here, because my elbow-out positioning meant that as I rotated, I was pointed slightly left of the target, and then had to move my barrel horizontally to the right to square it up on target. After dozens of repetitions over the course of the week, I finally have this step mastered… which is important if I’m ever going to get the next step right.
Smack
Once you’ve established your grip, cleared the holster, and rotated your gun on target while turning off any external safeties, it’s time to quickly bring the support hand to the pistol to form the “push-pull” that makes the Weaver position so stable. It is only at this time that the trigger finger is placed upon the trigger.
I’ll be honest and admit that I am still struggling to master a good Weaver stance, and I know that my shooting is suffering as a result of not having mastered the Weaver grip yet.
Fortunately, the Weaver Grip—like all parts of the presentation—is something that can be mastered in dry-fire practice.

Look
Once you’ve established your Weaver grip and thrust your pistol toward the target, you bring the sights to eye level while looking at the target. At this point you transition from looking at the target to looking exclusively at the front sight. As you do this, you take all of the slack out the trigger, which requires some practice on some triggers.
Then, and only then, are you read you ready to work on the compressed surprise break of the trigger.
The “look” seemed to be the bane of many of the students during the week. The tendency to want to look at the target (which is a threat, or we wouldn’t have drawn our weapons) instead of the front sight is a challenge to many, and the targets never lied. Quite a few of us kept dumping our shots low and left even when we had a good trigger press due to the tendency to want to look at the target instead of the front site. This flash sight picture of bringing the pistol to your eye and quickly transitioning to the sights is tough for many people to master.
It is because of this tendency to want to look at the target that the reminder, “front sight, press,” has become a mantra to good pistol shooters.
The tendency to look at the target instead of the front sight grew even more pronounced when we moved from the square range to the higher-threat, higher stress environment of the indoor simulators, but that is the subject for another article in the series.


Join the conversation as a VIP Member